Category: electronics

Sheding some (infrared) light on MLX90614

After implementing the MLX90614 driver for NuttX I noticed that although the write command to change the device I2C address in the EEPROM was reporting success, after the power cycle the new address was not working. Worst: even the previous address was not working.

Basically the device appears damaged and didn’t respond to any I2C command.

Then doing my research I discovered a Melexis document about SMBus communication:

Click to access MLX90614_SMBus.pdf

In this document I noticed they are using the address 0x00 instead of the default 0x5a address. After modifying the driver to use the 0x00 address the device accepted the new command.

There are many discussing about this subject on Arduino and similar forum:

https://chrisramsay.co.uk/posts/2014/09/arduino-and-multiple-mlx90614-sensors/
http://forum.arduino.cc/index.php?topic=54170.msg539601#msg539601
https://forum.mikroe.com/viewtopic.php?f=178&t=67842
http://wiki.wiring.co/wiki/Connecting_Infrared_Thermometer_MLX90614_to_Wiring

Note that someone discovered that using a brute force CRC approach eventually will work and everybody decided to copy it. Too bad guys!

The MLX90614 uses CRC8-CCITT standard to check if data are correct, so any CRC8-CCITT implementation will work, for example this one: https://3dbrew.org/wiki/CRC-8-CCITT

Now on NuttX you can call the mlx90614 example application to change the device’s I2C address this way: (changing from default 0x5a to 0x3a)

nsh> mlx90614 0x3a
Address 0x3a stored on your device!
Please do a power cycle and update the I2C board address!
nsh>

Compiling the Circuit Simulator kTechLab

I was searching for a circuit simulator for Linux and found kTechLab.

There is not a built package for Ubuntu (I’m using Ubuntu 16.04) then I compiled it from source code:

$ git clone https://github.com/ktechlab/ktechlab
$ cd ktechlab/
$ sudo apt-get install libqt4-dev
$ sudo apt-get install kdelibs5-dev
$ mkdir build
$ cd build
$ cmake ..
$ make
$ sudo make install

Then I just execute:

$ ktechlab

And kTechLab starts in all its glory!

Update: to install kTechLab on Ubuntu 20.04 I also installed:

sudo apt install extra-cmake-modules
sudo apt install libqt5serialport5-dev
sudo apt install libkf5completion-dev
sudo apt install libkf5config-dev
sudo apt install libkf5core
sudo apt install libkf5coreaddons-dev
sudo apt install libkf5configwidgets-dev
sudo apt install libkf5doctools-dev
sudo apt install libkf5iconthemes-dev
sudo apt install libkf5kio-dev
sudo apt install libkf5parts-dev
sudo apt install libkf5texteditor-dev
sudo apt install libkf5windowsystem-dev
sudo apt install gpsim-dev

SDCC went from worst STM8 compiler to best in a very short time

I never used STM8 but I’m impressed with this achievement of SDCC compiler.

The ST marketing materials put STM8 Dhrystone performance at 0.29 DMIPS / Mhz.

Commercial compilers as Raisonance achieves 0.289 DMIPS / Mhz, Cosmic achieves 0.296 DMIPS / Mhz and IAR achieves 0.347 DMIPS / Mhz. See benchmark comparison here: http://colecovision.eu/stm8/compilers.shtml

SDCC 3.5.0 achieves 0.151 DMIPS / Mhz and SDCC 3.6.0 achieve 0.167 DMIPS / Mhz.

Now the SDCC in the repository (Revision #9652) outperforms them all at 0.355 DMIPS / Mhz.

If you want to use STM8 on Linux, these links could be useful:
http://embedonix.com/articles/linux/setting-up-development-and-programming-for-stm8-on-linux/
http://www.cnx-software.com/2015/04/13/how-to-program-stm8s-1-board-in-linux/

Source: Philipp Klaus Krause email in the SDCC mailing list “STM8 Dhrystone performance – new record at 0.355 DMIPS / Mhz using SDCC”.

How to copy a schematic block in the KiCAD

KiCAD is a very nice EDA software, but it try to avoid copying blocks from a schematic to another (from different projects in this case).

Don’t worry! There is a way to you do that:

1) Select the block you want to copy;
2) Using the right mouse button select: "Save Block";
3) Insert a Hierarchical Sheet: menu Place -> Hierarchical Sheet;
4) Choose a "File name" for new sheet and click OK;
5) Press ESC and double click over the Hierarchical Sheet block;
6) Past (Ctrl+V) the saved block in this new sheet, save and close;
7) Open the other schematic where you want to include this block and import it:
   File -> Import Schematic Sheet Content

It might be easier, but KiCAD folks want to avoid users to mess.

Using OpenOCD to program a homebrew nRF51822 board

I created a board to test the Bluetooth Low Energy using Nordic nRF51822 chip, see:
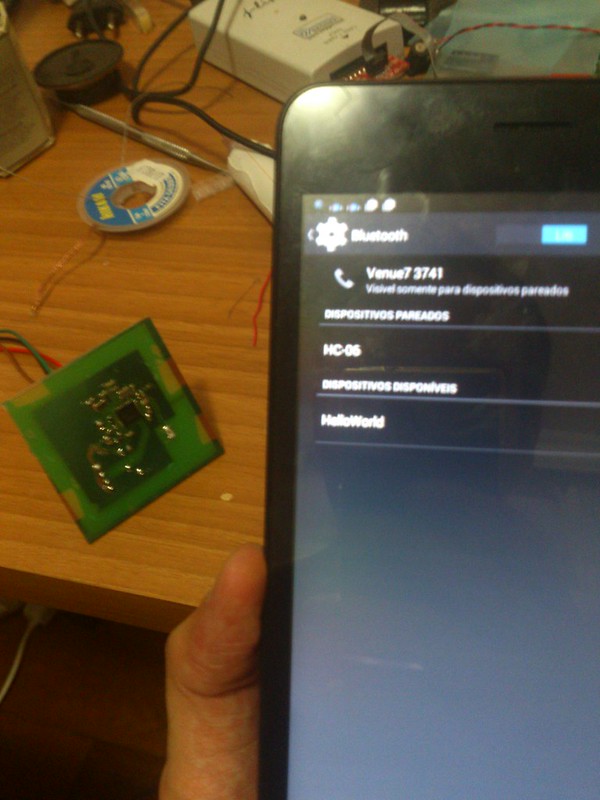
I did everything today (schematic, pcb routing, board etching, soldering SMD components and software test).

I used the nrf51-sdk from here:
https://github.com/relayr/nrf51-sdk.git

For flash programming I used OpenOCD with STLink-v2, this is my openocd.cfg:

$ cat openocd.cfg 
# nRF51822 Target

# Using stlink as SWD programmer
source [find interface/stlink-v2.cfg]

# SWD as transport
transport select hla_swd

# Use nRF51 target
set WORKAREASIZE 0x4000
source [find target/nrf51.cfg]

Then I just execute it from terminal:

$ sudo openocd -f openocd.cfg 
[sudo] password for alan: 
Open On-Chip Debugger 0.10.0-dev-00040-gd52070c (2015-11-01-10:42)
Licensed under GNU GPL v2
For bug reports, read
	http://openocd.org/doc/doxygen/bugs.html
Info : The selected transport took over low-level target control. The results might differ compared to plain JTAG/SWD
adapter speed: 1000 kHz
Info : Unable to match requested speed 1000 kHz, using 950 kHz
Info : clock speed 950 kHz
Info : STLINK v2 JTAG v17 API v2 SWIM v4 VID 0x0483 PID 0x3748
Info : using stlink api v2
Info : Target voltage: 3.233751
Info : nrf51.cpu: hardware has 4 breakpoints, 2 watchpoints
Info : accepting 'telnet' connection on tcp/4444
target state: halted
target halted due to debug-request, current mode: Thread 
xPSR: 0xc1000000 pc: 0x00000a40 msp: 0x20004000
auto erase enabled
Info : nRF51822-QFAC(build code: A1) 256kB Flash
Info : Padding image section 0 with 2112 bytes
Warn : using fast async flash loader. This is currently supported
Warn : only with ST-Link and CMSIS-DAP. If you have issues, add
Warn : "set WORKAREASIZE 0" before sourcing nrf51.cfg to disable it
target state: halted
target halted due to breakpoint, current mode: Thread 
xPSR: 0x61000000 pc: 0x2000001e msp: 0x20004000
wrote 93184 bytes from file s110_softdevice.hex in 4.252896s (21.397 KiB/s)
auto erase enabled
Warn : using fast async flash loader. This is currently supported
Warn : only with ST-Link and CMSIS-DAP. If you have issues, add
Warn : "set WORKAREASIZE 0" before sourcing nrf51.cfg to disable it
target state: halted
target halted due to breakpoint, current mode: Thread 
xPSR: 0x61000000 pc: 0x2000001e msp: 0x20004000
wrote 13312 bytes from file bletest.bin in 0.629010s (20.667 KiB/s)
Info : dropped 'telnet' connection

And in other terminal I execute:

$ telnet localhost 4444
Trying ::1...
Trying 127.0.0.1...
Connected to localhost.
Escape character is '^]'.
Open On-Chip Debugger

> reset halt
target state: halted
target halted due to debug-request, current mode: Thread
xPSR: 0xc1000000 pc: 0x00000a40 msp: 0x20004000

> flash write_image erase s110_softdevice.hex 0
auto erase enabled
nRF51822-QFAC(build code: A1) 256kB Flash
Padding image section 0 with 2112 bytes
using fast async flash loader. This is currently supported
only with ST-Link and CMSIS-DAP. If you have issues, add
"set WORKAREASIZE 0" before sourcing nrf51.cfg to disable it
target state: halted
target halted due to breakpoint, current mode: Thread
xPSR: 0x61000000 pc: 0x2000001e msp: 0x20004000
wrote 93184 bytes from file s110_softdevice.hex in 4.252896s (21.397 KiB/s)

> flash write_image erase bletest.bin 0x18000
auto erase enabled
using fast async flash loader. This is currently supported
only with ST-Link and CMSIS-DAP. If you have issues, add
"set WORKAREASIZE 0" before sourcing nrf51.cfg to disable it
target state: halted
target halted due to breakpoint, current mode: Thread
xPSR: 0x61000000 pc: 0x2000001e msp: 0x20004000
wrote 13312 bytes from file bletest.bin in 0.629010s (20.667 KiB/s)

> exit
Connection closed by foreign host.


I connected the OpenOCD to SWD pins as explained here:
https://github.com/RIOT-OS/RIOT/wiki/Board:-yunjia-nrf51822

That’s it!

VSCP: Very Simple Control Protocol

I found about VSCP (www.vscp.org) in the Twitter and just start reading its specification and documentation.

VSCP is a control protocol developed by Åke Hedman since 2000, then it is about 15 years old! Many people are using it for home automation: http://www.vscp.org/wiki/doku.php/who_why_where/the_vscp_team.

The source code is released as GPL/LGPL but has some modified clauses that let users to use it in a “non-viral” mode. You just need to release the modifications you did (if you did it) in the VSCP code. This is similar to FreeRTOS GPL license in this sense.

It is a surprise to know that 8devices USB2CAN dongle has a VSCP driver:
http://www.8devices.com/usb2can

The 8Devices owner is a nice guy, even the USB2CAN schematic is released:
http://www.8devices.com/media/files/usb2can.pdf

Novo site sobre eletronica e arduino

Há alguns dias o Augusto Campos do BR-Linux lançou um novo site para documentar suas experiências durante seu aprendizado de eletrônica e arduino. Seu novo site se chama BR-Arduino.org.

Neste curto espaço de tempo o Augusto já publicou vários posts interessantes sobre o tema. Leitura recomendada a todos que queiram aprender sobre Arduino.

Boa sorte Augusto e parabéns pela iniciativa!

Como projetar placa no KiCAD para facilitar a montagem em empresa externa

Você já viu aqui algumas dicas de como preparar seu projeto para fabricar a PCB.

Felizmente seu projeto deu certo e o cliente pediu milhares de placas! “Ôh, e agora? Quem poderá montar minhas placas?” Existem várias empresas que podem montar os componentes na sua placa, mas será que você desenhou sua placa pensando nos detalhes para montagem numa empresa externa?

Neste artigo você encontrará várias dicas de como preparar seu projeto pensando na montagem externa:
http://rheingoldheavy.com/design-assembly-kicad/

Creating a ZVS high voltage circuit

This site has the ZVS schematics and explanation:

http://wiki.4hv.org/index.php/Flyback_transformer

There are many tips in the forum, but it is not accessible anymore, fortunately it is archived:

https://web.archive.org/web/20080218130627/http://old.4hv.org/index.php?board=18;action=display;threadid=5667;start=msg58867

To discover the Flyback pinout find this tutorial:
http://lifters.online.fr/lifters/labhvps/tht.htm

I need to create a high voltage circuit to implement an electrostatic painting. It will be used to coat a virgin PCB with photosensible ink.

Update: I will start with a more simple and less powerful driver using the CI 555 : http://www.eleccircuit.com/efficient-flyback-driver-circuit-by-ic-555-irf510/. These ZVS are ways over the lethal current (10mA) your heart will support.

Listagem de algumas empresas de fabricação de PCB no Brasil

Esta é uma lista com as principais empresas que fabricam PCB no Brasil:

Alfapress:
http://www.alfapress.com.br

BR PCI:
https://www.brpci.com.br

Circuibras:
https://www.circuibras.com.br

Curta circuito:
https://curtacircuitos.com.br

Cirvale:
https://www.cirvale.com.br

Digicart:
https://www.digicart.com.br

Griffus:
http://www.griffuspcb.com.br/fabricacao-placas-circuito-impresso.html

GPO
http://www.gpocircuitos.com.br

LKpads:
https://www.lkpads.com.br

Lauquen:
http://www.lauquen.com.br

Micropress:
http://www.micropress.com.br

Montecnica:
https://www.montecnica.ind.br

PCB Brasil:
http://www.pcbbrasil.com

PCI Paraná:
http://www.pciparana.com.br

Stick:
http://www.stick.ind.br

TEC-CI:
https://tec-ci.com.br

Tecnel:
http://www.tecneleletronica.com.br

Caso você conheça outras empresas, poste seu comentário para que possamos atualizar esta lista.